Showing posts with label Recipe. Show all posts

Thursday, 19 November 2015

Steak on a Board with Ratatouille

Have you ever craved a meal for so long that you finally caved and just made it?  Well, this is what kind of happened with me.  I had dreaming about a good ratatouille for ages and kept meaning to make one.  Ideally the same one that features in the film (I later found a recipe for that version and, quite honestly, for a simple quick rat, that seemed far too complicated!)

In our house as well, one cannot simply subsist on vegetables alone.  I am fairly sure that was incorporated into our marriage vows, so I needed to provide a suitable red meat accompaniment to the pile of courgette and tomato I was preparing to serve.
That's where the steak comes in. I must confess, steak and ratatouille is not an original concept- Jamie got there long before I did and I have no doubt that thousands more got there before him, but my rat is not the same one as his, although the steak part most definitely is. 

It is however quite quick (relatively speaking - you can't get the complex flavours of a good rat with only 30 minutes of cooking, no matter how many tricks and cheats you use) and easy. I cooked it as a mid-week supper for after work and it feels positively virtuous before the onslaught of Christmas decadence.  You can also cook the ratatouille a few days in advance and just warm it up when you want dinner - this actually makes it even better as the flavours have time to develop and it will save you even more time when you are stressed after a long day at work.

Now, the purists out there are going to argue with me and tell me that this is not a traditional rat as it does not involve cooking all the individual elements separately before bringing them together and I am not pan-frying the main veg element first.  I'm sure that creates an outstanding version that any French grandmother would be proud of, but frankly, when it is 5.30pm and I need dinner served by 7.30pm, who has the time?!

I took a tip from Felicity Cloake and made mine with a piperade on the bottom and balsamic vinegar to add a richness and depth of flavour which it could otherwise lack, especially if you are using vegetables out of season and this more than compensates for the cheats method of layering your veg without pre-cooking. 
So lets start with the ratatouille

3 courgettes, thinly sliced
8 plum tomato's, 4 peeled and diced, 4 thinly sliced
2 red peppers
1 aubergine , thinly sliced
1 medium onion, diced
3 tbsp garlic infused olive oil
3-4 fresh basil leaves
1 tablespoon dried thyme
1 teaspoon dried thyme
1 clove garlic, minced
1 tsp good balsamic vinegar
Pinch of sugar
Salt
Pepper

Heat the oven to 140C,

Place the peppers over the open hob flame, or scorch them with a cook's torch, or halve them and place them cut side down on a lightly oiled baking tray and bake for 20 minutes.  You are looking to blister the skin so that you can remove it, so do this anyway that works for you.  Heck you could even put them on a slab of marble in your wood fire if you want!

Whilst your peppers are blistering, heat 2 tablespoons of the garlic infused olive oil over a low heat in a pan then cook the onions gently and slowly until translucent and soft (8 minutes or so should do it depending on how finely you chopped your onions).  Stir in the diced tomatoes and tablespoon of thyme and simmer gently for about 5 minutes.

Remove the skin from the blistered peppers and cut them into small dice, then add them to the tomato's and cook for another few minutes.  Add the balsamic vinegar and some salt and pepper and a pinch of sugar. Taste and adjust the seasoning if needed.

Spread this tomato and pepper sauce (the piperade) over the bottom of a baking dish then arrange your sliced vegetables (tomato, courgette and aubergine) in alternating layers on top. Mix the remaining garlic olive oil with a teaspoon more thyme and drizzle over the top, then sprinkle the basil leaves.

Cover with foil or a lid and bake for 1.5 hours. Uncover for the last 30 minutes of cooking to crisp up the top layer of vegetables a bit.  Garnish with a few more fresh basil leaves and serve with the steak.

While the ratatouille is cooking uncovered for the last 30 minutes, you can get on with the steak.
2 x 250 g quality sirloin steaks, fat removed
1 teaspoon paprika 
1 tablespoon good (but not extra virgin) olive oil
½ bunch fresh flat-leaf parsley
1 heaped teaspoon Dijon mustard
1 tablespoon extra virgin olive oil
Juice of ½ lemon
Start by dressing your board.  Mix the mustard with the extra virgin olive oil, lemon juice and some salt and pepper and drizzle over the board.  Scatter the parsley over the top.

Get a griddle pan nice and hot and rub the steaks with the olive oil and paprika and some salt and pepper.  Always oil your steak, not the pan!

Sear the steak on one side and then turn until cooked to your liking.

Allow to rest for the same amount of time as you cooked it for (at least), then carve it into strips and place it on the board.

Serve the board with the ratatouille and allow people to dig in, wiping up the mustard dressing as they do.
There are no carbs in this meal, and to be honest it is filling enough that you don't need them.  If you feel an overwhelming desire for starch though, try with some fresh baked crusty bread - perfect for mopping up the the ratatouille and steak juices.

If you like (or hate!) what you have read, please do let me know in the comments below or slap me with a cheeky follow, or say Hi to me on my Facebook group or Twitter or Instagram

Wednesday, 15 July 2015

Chilli Con Carne

Steve and I have quite a good system when it comes to the household chores.  We share basically everything, bins are him, laundry is me, back garden is his responsibility, front garden is mine to maim, butcher and destroy.  We take it in turns to do the cooking as well, and much as it irks me to admit, he is at least as good a cook as I am.  Sometimes I think he is better.  He, at least, doesn't completely bugger up oven chips every time he tries to cook them.  Seriously, the last time I cooked them, I followed the packet exactly and they still came out frozen and burnt at the same time.  It's a unique skill.
This particular weekend he was let loose on my spice cupboard and recipe books and came out three hours later with bowls of the most delicious chilli con carne I had ever tasted.  Naturally it was a Thomasina Miers dish - everything in her books is just delicious, I once made my way through a jar of her chipotles en adobo sauce at a friends house who had just made approximately two gallons of the stuff - and I was more chuffed by the fact that I already had every single ingredient in stock in the house.

Every.  Single.  One.

I apparently keep a well stocked kitchen.  I am my mother's daughter.
This is one of those recipes that you can quite happily leave cooking merrily on its own whilst you go and attend to all those pesky chores that life demands you keep on top of.  Like accidentally pulling out that large plant in the front garden you thought was a weed and turns out to be quite an expensive shrub your husband had planted three years earlier and was finally getting to be a decent size.

Turns out the only green fingers I have are those caused by wearing cheap fashion rings.

So if you fancy a bloody good chilli this weekend, this is what you will need to check you have in your kitchen:

1kg minced beef
300g spicy chorizo
3 onions
4 cloves of garlic
olive oil
2 teaspoons allspice
2 teaspoons ground cumin
1 teaspoon cloves
1 large cinnamon stick
3 bay leaves
2 teaspoons dried oregano
2 deseeded ancho chillies
2 chilies de arbol
2 teaspoons sea salt
black pepper
3 tablespoons cider vinegar
800g tinned tomatoes
2 tablespoons ketchup
2 tablespoons muscovado sugar
800g kidney beans

Preheat the oven to 120C and bring the meat to room temperature.

Finely chop the onions and garlic

Sear the meat in 2 tablespoons of olive oil in a large casserole dish.

Set the meat to one side and add another small glug of oil to the casserole dish.  Brown the chopped chorizo in the oil until it is scented and golden brown with the sausage oils.  Remove the chorizo.

Add the onion, garlic, spices, herbs and chillies and cook in the chorizo oil until soft.  Season with salt and pepper, add the vinegar, tomatoes, ketchup and sugar.

Return the meat to the pan and top up with 400ml water, bring to a simmer and cook, covered in the oven for 2 hours.

After two hours, give it a stir and add the beans.  Cook for another hour.

Serve with a big pile of rice, some chopped coriander, salsa, cheese if you want and lime wedges. Add sour cream if you need to cool the heat down a little.

This chilli would also be amazing on top of jacket potatoes, on a hot dog or piled onto a mound of nachos with a group of friends, some beers and a good film.

Wednesday, 8 July 2015

Reggae Burgers

It's the height of summer and if the blazing sunshine and soaring temperatures are anything to go by, then it is most certainly BBQ weather.
The Nottinghill Carnival is next month and if, like me, you really wish you could be there but can't, then I think that these are the perfect substitute to add a little Jamaican flare into your summer parties!
These succulent burgers have a wonderfully warmth to them, nothing too overwhelming and the distinctive combination of heat and sweet that Jamaican food is so famed for.  Add some sweet potato chips and you have a Caribbean feast.

Burgers (makes 4 good sized patties)
500g good quality minced beef
1 scotch bonnet, de-seeded and minced.  Leave the seeds in if you want more of a heat hit.  If you can't get hold of scotch bonnets, use habanero's instead although the flavour profile won't be exactly the same.  Don't substitute with birds eye chilli's - the taste will be completely different.
1 clove garlic, minced
2 teaspoons cider vinegar (white wine or rice vinegar would also work, not malt)
1 tablespoon water
1 teaspoons ground thyme
1 teaspoon runny honey
1 teaspoon allspice
1 1/2 teaspoons Jamaican Jerk seasoning
1 teaspoon ground ginger
1/2 teaspoon cinnamon
1/2 teaspoon nutmeg
1 tablespoon reggae reggae sauce (I used Levi Roots).
Good sprinkle of freshly ground salt and pepper
Salsa
50g mango, finely chopped
50g pineapple, finely chopped
Juice of 1 lime
4 fresh mint leaves, finely chopped
Mix all the ingredients for the beef together, apart from the mince.

In a large bowl break the mince up and form into 4 patties

Split the seasoning evenly over each pattie and work in, smushing it around and moulding it back into a patty shape.  You can just pour the seasoning over the mince in the bowl first if you want, but I find that the split and then pour method ensures a much more even distribution of flavour.
Put the patties on a plate and rest in the fridge for at least an hour before cooking.  This is important as if you don't let them rest you will find that your burgers simply fall apart when you try and cook them.  You can grill, BBQ or fry these - up to you!

Mix all the salsa ingredients together and leave to rest, covered, in the fridge for at least an hour to allow the flavours to develop.
When you are ready, griddle, BBQ or fry the burgers until just cooked all the way through, melting some cheese on the top if you are that way inclined.

Layer up your buns with salad and the burger, top with the salsa and add a little extra Reggae Reggae sauce to really make it sizzle.

Steel band playing as you eat optional.

Wednesday, 17 June 2015

Gin and Grapefruit Salty Dogs

Let me introduce you to my new favourite summer drink.  This, ladies and gentleman, is the sour perfection of a Salty Dog.  Gin and Grapefruit juice mixed with fresh lime, poured over flakes of ice and sipped through a salt rim.

Summer cocktail?  Nailed it.
As for the summer statement, well, we can live in gleeful anticipation can't we!  I was reliably assured last night by Steve that our summers start AFTER longest day, something to do with Gulf Streams, but I am taking that to mean that I can go paddling in the sea down at Broadstairs from this weekend onwards. 

Now, I love a margarita - the salty sour tang is just perfection in a glass, but I am not a big tequila drinker.  If you love the idea of a margarita but don't like tequila, then this will most definitely tick the box.

It was also National Gin Day last Saturday, which means it is officially Gin Week so, basically, you have to drink one - it's the law.
You may recognise gin and grapefruit juice as a Greyhound and in all honesty it is only the presence of a salted rim which turns this dog into its peg leg cousin who likes to sail the high seas.  Either way it is seriously delicious.  It just exudes summertime and is a major step up from an Orange Blossom, which in my opinion is just harsh on the palate

All you need is some gin (I used Gordon's Cucumber for that extra fresh hit, but any good quality gin would work), some good grapefruit juice (golden, not pink if possible, pink is a little too sweet) and a fresh lime.

Add 200ml of grapefruit juice to 50ml of gin and squeeze some lime juice in.  Mix well.  That's it!  No mixology courses required here!

Salt the rim of a highball or martini glass by moistening it (the leftover lime is good for this) and rolling it in salt and add some crushed or flaked ice to the bottom of the glass.  Pour the cocktail over the ice and garnish with a slice of lime.

Enjoy whilst lounging indolently in the summer sun.

You could even freeze this and crush it for a very grown up, very refreshing slushy! 
If you like (or hate!) what you have read, please do let me know in the comments below or slap me with a cheeky follow, or say Hi to me on my Facebook group or Twitter or Instagram!

Tuesday, 17 March 2015

Prawn Stir Fry

Sometimes there is nothing better than a simple, straightforward stir fry.  Crunchy fresh vegetables, prawns and noodles all coated in a zingy, lightly spicy sauce.  The leftovers make for a brilliant packed lunch as well!
I've tried a few packet sauces for stir fry from the supermarket, and have found every single one, without fail, to be utterly bland and flavourless.  I'm not sure what it is about pre-made stir fry sauces, but it seems as though companies are just afraid of tickling the taste buds. 
That is not what I want when I am eating my dinner.  I want flavour and zing with contrasting hot and sharp tang.  After being utterly fed up with the offerings, I stuck my head in my kitchen cupboards, pulled out every bottle of Asian inspired sauce I had and started pouring, tasting and tweaking in a bowl until I had created my own stir fry sauce that is, as far as I am concerned, a flavour sensation. 

Patent pending.

Prawn Stir Fry

200g packet raw king prawns (or chicken or lean strips of beef or pork)
1 packet stir fry vegetable mix (or make your own with chopped red and green peppers, shredded cabbage, baby corn, finely chopped red onion, diced courgette, mange tout, shredded carrot and broccoli)
1 x 350g packet bean sprouts
1 x 350g packet vermicelli noodles
Couple of handfuls sweet corn
1 teaspoon wok oil or vegetable oil
1 lime

Dressing

2 tablespoons siriachi sauce
1 tablespoon rice wine vinegar
1 tablespoon hoisin sauce
2 teaspoons ground ginger (fresh would be better, peel and julienne 1 x inch strip of ginger, I didn't have any in the house though)
2 teaspoons chinese five spice
1 teaspoon toasted sesame oil
1 tablespoon dark soy sauce
1 tablepoon sesame seeds
Juice of 1 lime

Get everything lined up and the dressing pre-mixed before you turn the hob on.  Once the heat goes on, everything happens very quickly!
In a large wok (or deep frying pan if you don't have a wok) heat the oil.  When the oil is very hot (hold your hand over it, you should feel the heat on the palm of your hand almost instantly), throw in all of the mixed vegetables and stir continuously for 1 minute. 

Add the bean sprouts and noodles and stir for 1 more minute

Add the prawns and sweet corn and stir until all prawns turn pink.

Throw in the dressing and stir for a further minute or until everything is lightly coated.

Sprinkle some more sesame seeds on the top and serve with the lime cut into wedges.

If you can eat this with chopsticks, then I commend you.  I'm normally not too bad when I use them, but for some reason I really struggle with noodles, and this dish has oodles of noodles!
By the way, did you know that elephants are a symbol of good luck and good fortune in Asian cultures?  I have a few elephant statues and ornaments in my house, and my grandmother always taught me to make sure that the elephants' trunk points towards the entrance of the house. That way only good fortune will ever enter.

It's probably all supersititious nonsense, but I still make sure that all my elephants always have their trunks pointing at the front door, no matter where they are.
 
If you like (or hate!) what you have read, please do let me know in the comments below or slap me with a cheeky follow, or say Hi to me on my Facebook group or Twitter or Instagram!

Wednesday, 25 February 2015

Builders Breakfast Pasta

One day I came home from work to find the sorry looking remains of a fry up in the fridge.  Leftover, uncooked sausages, black pudding, bacon, tomatoes and mushrooms were scattered haphazardly across the shelves, whilst a sheepish looking Steve sat on the sofa.

"I got hungry".

The problem was, we didn't have enough leftover bits and pieces for two complete grill ups (always a grill up when I'm cooking it) and I didn't want to waste anything.

That's when it hit me.  Builders Breakfast Pasta - a pasta sauce made out of all the fry up ingredients.  We were both rather sceptical about it, but thought we should at least give it a go for dinner the following evening.
This is the surprisingly delicious result of that experiment.
So, for a pasta dish fit to grace the hallowed tables of any honest corner cafe frequented by builders, students, emergency service workers at the end of their shift and anyone in need of a strong hangover fix, you will need (for 2-3 people):

The leftovers from a fry up the previous day (or just get some sausages (about 3), 2-3 rashers of unsmoked streaky bacon, a handful of (about 6 medium) button mushrooms, some slices of black pudding and a couple of peeled tomatoes, all chopped into bite size pieces)
1 tin of tinned chopped tomatoes
125g dried pasta (I used penne as it is what I had to hand)
1 tablespoon dried or frozen basil, or a couple of shredded leaves of fresh basil
1 tablespoon dried oregano
1/2 teaspoon sugar
1 tablespoon tomato puree (optional)
1 teaspoon garlic oil OR
1/2 teaspoon vegetable oil
1 crushed clove of garlic
Tabasco (it is me, after all)

Heat the garlic oil or the vegetable oil in a pan and add the crushed garlic clove to the oil if you are using it.

Add choppped sausage, bacon and black pudding to the pan and fry until lightly browned
Add the mushrooms to the pan and fry for 3-5 minutes
Add the chopped tomato and the tin of chopped tomatoes to the pan and stir to form a sauce

Add the herbs, sugar and tomato puree to the pan, bring to the boil and reduce to a simmer.  Check the seasoning and add salt and pepper as required.  Cover and leave to simmer while you cook the pasta

Put the penne in a pan of lightly salted boiling water and cook according to the packet instructions

Drain, reserving a half ladle of the starchy cooking water.  Add the water to the pasta sauce and stir through until the sauce becomes a bit more glossy. 

Pour the drained pasta into the sauce and stir it all together then leave to simmer for 2 more minutes.

Serve - tabasco optional (and in my case, essential)!
If you like (or hate!) what you have read, please do let me know in the comments below or slap me with a cheeky follow, or say Hi to me on my Facebook group or Twitter or Instagram!

Friday, 13 February 2015

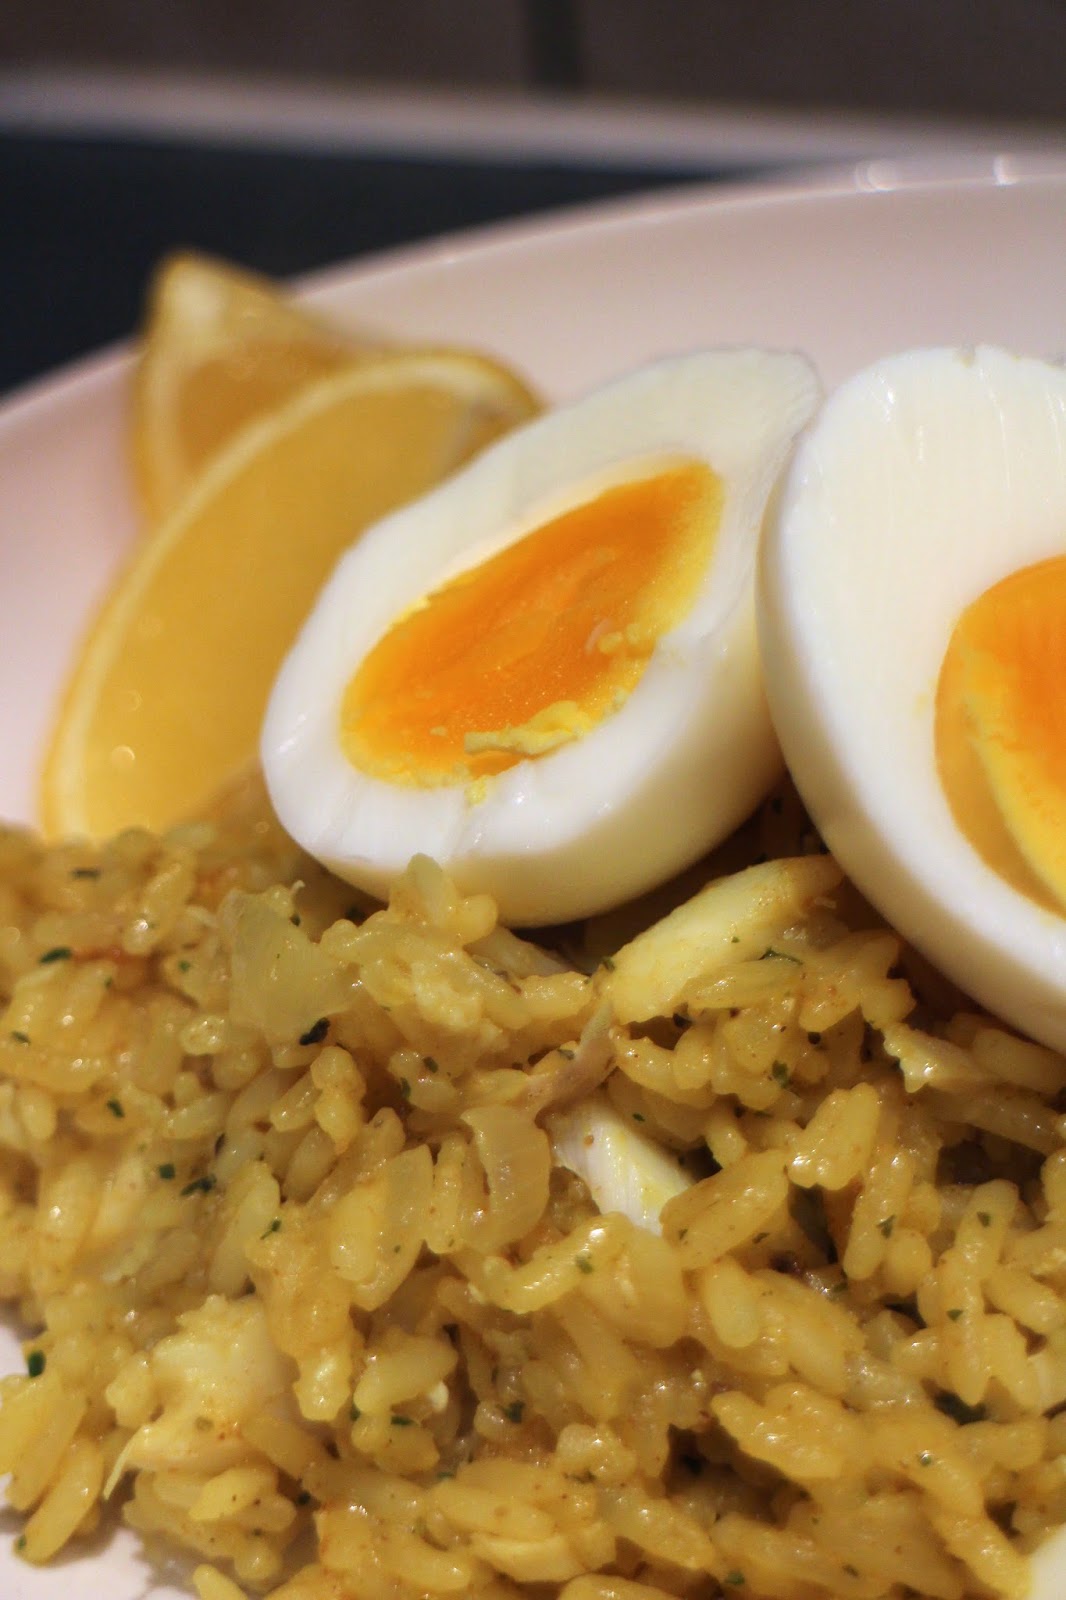
Kedgeree

Kedgeree is a favourite in our house and is one of those dishes that is great for people who aren't the biggest fishy fans in the world as it is not overpowering; the flavours are subtle and fragrant.  It's not secret that I love my rice dishes - Jambayala is another firm favourite and a friend instagrammed a Bibimbap the other day that got me drooling - expect a version in the near future!
Kedgeree though is always one I fall back on, probably because it is so versatile!  It is traditionally an Anglo-Indian breakfast dish, but we normally serve it for dinner in our house.  I am in no way organised enough in the mornings to sort out breakfast; the best I can do is some fruit or a couple of breakfast biscuits with a cup of tea at my desk while I blearily check emails on any given weekday!  The leftovers however make a brilliant lunchbox meal that gets the rest of the office staring jealously over your shoulder as you chow down.

I was particularly stupid with this dish.  I used to think it was Scottish (probably due to the smoked fish) and it never occurred to me that it wasn't until a few years ago when I started cooking it myself.  It wasn't until I adapted a version from The Spicery into this recipe and noticed all the Indian spices that everything clicked into place.  I'm an idiot.

As I mentioned, this recipe is originally inspired by the one that you get with The Spicery boxes and full credit goes to them, but I have adapted it slightly.

Make the spice mixes first - you will have more than you actually need to use, so pop the leftovers into a little food bag, label it and stick it in the cupboard somewhere dry and dark.  It makes a great rub for chicken or fish or add it to a curry when you are frying the onions for some extra depth of flavour.  Try sprinkling the leftover herb mix through cooked rice and frying it off in a pan for some added interest.  Use it within a few days (a couple of weeks at the most) so that the flavours don't deteriorate too much.
  • 2 onions, 1 finely chopped, 1 cut in half
  • 3 cloves of garlic, thinly sliced
  • 250g basmati rice
  • 300g smoked haddock
  • 250ml semi skimmed milk
  • 250ml water
  • 4 eggs
  • 60g butter
  • 2 lemons
  • Whole spices: 1 bay leaf, 1 cinnamon quill, 1 tsp green cardamon pods (available at the supermarket)
  • 2 tsps Spice Mixture  (1 tsp turmeric, 1 tsp ground coriander, 1 tsp cumin, 1 tsp ground cardamon, 1/2 tsp nutmeg, 1.2 tsp cayenne, 1/2 tsp cinnamon, 1/2 tsp ground black pepper, 1/2 teaspoon ginger, 1/4 tsp ground cloves -grind it in a pestle and mortar and mix it all together into one spice medley).
  • 2 tsps Herb Mixture (1/2 tsp ground coriander leaf, 1/2 tsp turmeric, 1 1/2 tsp toasted mustard seeds, 1 1/2 tsp toasted cumin seeds, 1 tsp parsley leaf, 1 tsp garam masala and grind together in a pestle and mortar.
Note: you need to toast the spices yourself, just chuck them into a dry frying pan and heat gently for about 30 seconds.  The second you start to smell them, whisk them out and straight into the mortar.
Boil the eggs for 8 minutes and leave to cool

Combine the water, milk, halved onion, sliced garlic, whole spices and 1/2 tsp salt in a large shallow pan.  Bring to the boil, reduce the heat and simmer for 5 minutes.  The smell from this milk bath is just divine!

Add the fish, cover and leave to simmer on the lowest heat for 10 minutes

Remove the fish and leave to cool, keep the scented milk mixture in the pan
In a separate large shallow pan with a lid melt the butter and cook the chopped onion until translucent

Add the rice, raisins and spice mixture to the onions.  Stir until it is all evenly covered

Strain the milk over the rice, discarding all the bits left in the milk pan

Cover and simmer for 15 minutes, stirring occasionally until the rice has absorbed all the milk and is cooked and fluffy.  Add a bit more water if needed

Flake the fish into bite size pieces and add to the rice with the cooked lentils and the herb mix, with 1/2 tsp salt and the juice of 1 lemon.  Stir and recover for a further 5 minutes.  The liquid should have all evaporated and the whole dish be fairly dry.

Chop up 2 of the eggs and mix them through the rice, then halve the other two and lay them on top

Serve with lemon wedges and Asian chutney.  Sambal Assam works particularly well!  You can also add cooked green lentils and raisins to the rice during the final cooking stage.  Steve doesn't like them, so I didn't. 
If you like (or hate!) what you have read, please do let me know in the comments below or slap me with a cheeky follow, or say Hi to me on my Facebook group or Twitter or Instagram!

Monday, 5 January 2015

A Tale of Two Cupcakes

A friend is soon off to have her first baby, so we decided to adopt that American tradition of showering the mum-to-be in gifts, cards and imitation-sparkling-wine-from-champagne-flutes-so-it-felt-classy at a baby shower .  Claire hosted at her place, and all the girls contributed a little something to our afternoon tea themed celebration. 
Cupcakes were my responsibility (after all, nothing says "you're having your first baby, get used to a reliance on sugar to get you through the day" better than cake) so I turned to my trusty Primrose Bakery cookbook for inspiration.  I knew I wanted cupcakes that were season appropriate, and cranberry, orange, chocolate and peppermint sounded like the perfect combinations (not all in one cupcake I hasten to add!)  After a quick check that the mum-to-be could eat all of the ingredients that go into these rather decadent treats without causing any harm to the baby, I cranked out a couple of batches the morning of the party.

I went for Chocolate with Peppermint Icing and Orange and Cranberry with Orange Blossom Icing
I admit that 24 cupcakes may have been a little excessive for a party comprising of 5 people, but I was counting on my office colleagues to finish of any leftovers and they did not disappoint.  The various men in our lives also managed to help make sure that none went to waste when they came to pick the ladies up post party.
As this suggests, these cupcakes will keep for a couple of days in an air tight container (do not refrigerate), but don't keep for any longer than that!  These are pretty rich cupcakes as well - one per person is normally more than enough!
Chocolate Cupcakes

115g 70% dark chocolate
85 unsalted butter (room temperature)
175g soft brown sugar
2 eggs, separated
185g plain flour, sifted
3/4 tsp baking powder
3/4 tsp bicarbonate of soda
1/4 tsp salt
250ml semi skimmed milk (room temperature)
1 tsp good quality vanilla extract

Preheat the oven to 170C and line a 12-hole muffin tin with cupcake cases

Melt the chocolate and leave to cool slightly

Cream the butter and sugar until pale and smooth.  In a separate bowl beat the egg yolks for several minutes.  Slowly add the egg yolks to the creamed mixture and beat well.  Add the melted chocolate and beat again.

Combine the flour, baking powder, bicarbonate of soda and salt in a seperate bowl.  Mix the milk and vanilla extract together.  add 1/3 of the flour mix to the chocolate mix and beat well.  Add 1/3 of the milk mix to the batter and beat well.  Repeat twice more with the flour and milk mixes.

Whisk the egg whites in a separate bowl until soft peaks start to form.  Carefully fold the egg whites into the batter using a metal spoon.  Do not beat.  The batter will be quite liquid/

Carefully spoon the mixture into the cupcake cases, filling to about 2/3rds full.  Bake for 20-25 mins until a skewer comes out clean.  Leave to cool in the tin for at least 10 minutes before turning onto a cooling rack and allowing to cool completely before icing.
Peppermint Buttercream Icing.

110g unsalted butter (room temperature)
60ml semi-skimmed milk
1/2 tsp good quality peppermint extract
500g icing sugar
Couple of drops of peppermint green food colouring
Couple of candy canes, lightly smashed up or small peppermint sweets

Beat the butter, milk, peppermint extract and half the icing sugar until smooth.  Gradually add the remainder of the icing sugar until smooth and creamy.  Taste and add more peppermint extract if required.

Add a drop of food colouring and beat well.  Continue to add in single drops and beat until the buttercream is the required colour.

Ice using an icing bag if available and decorate with smashed up candy canes or peppermint sweets
Cranberry and Orange Cupcakes

2 large eggs
200g caster sugar
100g corn oil
135ml sour cream
1 teaspoon vanilla extract
Grated zest of 1orange
230g plain flour
1/2 tsp baking powder
1/4 tsp bicarbonate of soda
1/4 tsp salt
1 tsp ground cinnamon
140g fresh, finely chopped cranberries

Preheat the oven to 140C and line a 12 hole muffin tin with cupcake cases

Beat the eggs and sugar together until light and fluffy and then slowly add the oil a little at a time, beating well after each addition.  Repeat the process with the sour cream and vanilla extract and finally the orange zest.

Sift the dry ingredients into a bowl and then add to the batter and beat well.  Fold in the chopped cranberries gently.

Spoon the mixture into the cupcake cases, filling to about 2/3rds full.  Bake for about 25 minutes or until slightly raised, golden brown and a skewer comes out clean from the centre.

Allow to cool in the tin for at least 10 minutes before turning out to a cooling rack.  Once they are cool completely, go icing mad.
Orange Blossom Buttercream

115g unsalted butter (room temperature)
Juice of 1 freshly squeezed orange (a big one)
500g icing sugar
2 teaspoons orange blossom water

Beat the butter, juice and half the icing sugar together until smooth.  Gradually add the remainder of the icing sugar and beat until smooth and creamy.  Add the orange blossom water and beat again.  Taste and add more orange blossom if required

Ice using an icing bag if available and decorate with whole cranberries
I've now made a few different cupcakes from the Primrose Bakery book and they have never disappointed!  I love their flavour combinations as well.

Any particular ones that you would recommend?

If you like (or hate!) what you have read, please do let me know in the comments below or slap me with a cheeky follow, or say Hi to me on my facebook group or twitter!

Monday, 22 December 2014

Tiny Tarts and Christmas Mish-Mash

Every year, without fail, I hit the kitchen at Christmas to get baking.  These cranberry tarts, mince pies and Christmas mish-mash are tried and tested favourites which fill the house with the scent of ginger, cinnamon and fruit and always manage to help with our Christmas spirit.  They are also perfect to make with children and ideal for putting out for Santa's treat!

They are also really simple - like every other person around this time of year, I am always a bit flustered in the build up to Christmas day and so I cheat as much as possible.  I don't bother making my own pastry and I certainly don't make my own mincemeat, but if you feel the inclination (and have more time on your hands than I do), please go ahead!
I first made the cranberry tarts about 6 years ago.  I was making my own cranberry sauce ready for the turkey sandwiches and could only get hold of a big punnet rather than my usual sized one.  I decided to use the leftover sauce to fill some little tarts, and Steve has requested them every year ever since!  They are not sweet at all; the sugar just reduced the sourness of the cranberries to a more palatable tartness!
You need:

1 sheet ready rolled shortcrust pastry (fully defrosted)
300g fresh cranberries
100g granulated sugar
Splash water

Pre heat the oven to 180C and grease a 12 hole shallow muffin tray

Put the cranberries, sugar and water into a saucepan and cook on a medium heat for about 10 minutes or until the cranberries have broken down and you have a tart sauce.

Cut out pastry disks slightly larger than each muffin tray hole and smaller ones for the lids - I used stars and gingerbread men - and press the larger ones into the holes in the tray.  Fill up each case with the cranberry sauce and then pop a top on each tart. 

Bake for about 15 minutes until golden, remove and leave to cool for 10 minutes, then remove to a cooling tray.

Dust with icing sugar; they will keep for about 3 days in an airtight container.
I also made a batch of mince pies the exact same way, but filled the pastry cases with pre-bought shop mincemeat rather than the cranberry sauce.  They look quite similar once cooked, so I always make sure I put different shaped lids on the tarts to tell them apart!
My Christmas mish-mash is an utterly made up recipe and so called because it is a mish-mash of all the Christmassy flavours I have lying around the house whenever I make it.  Most of the technique involves mashing ingredients as well, so it was the obvious name.  As it is reliant upon using up whatever I have buried in the kitchen cupboards it is never the same twice.  I first made it at Christmas in 2008.  Lauren was over for a chat (at the time she still lived up the road from me in Canterbury and hadn't disappeared to the big smoke yet) and we were mucking around in the kitchen.  We ended up with the first version of these after raiding my cupboards, and I have made it pretty much every year since.  I started off calling them cookies, but that name is really misleading.  They are more of a cross between a cake and a brownie!
So, if you want to make some mish-mash's for Santa, here is how!

200g plain flour
100g caster sugar
100g dark brown or muscovado sugar
200g unsalted butter at room temperature
200g mixed fruit and nuts - whatever you fancy or have lying around (pecans, raisins, sultanas, cranberries, chocolate chips, dates, figs, glace cherries etc)
100g oatmeal
Juice and zest of 1 orange
Zest of 1 lemon
1 tsp cinnamon
1 tsp cassia bark (or 2 tsp cinnamon)
4 ground cloves
1 tsp ground ginger
2 tsp all spice
2 tsp nutmeg
2 eggs
1/2 tsp bicarbonate of soda
Mash the granulated and brown sugar with the butter until you have a smooth paste.  Add the orange juice and eggs and mix to fully incorporate

Mix all the other ingredients together then add to the sugar, egg and butter mixture and mix fully

Bake at 180C for 20-30 minutes

Leave to cool in the tin for 10 minutes before turning out and leave to cool completely before cutting up.
Happy Christmas!  I'm not sure Santa should get these after all....

If you like (or hate!) what you have read, please do let me know in the comments below or slap me with a cheeky follow, or say Hi to me on my facebook group or twitter!

Wednesday, 3 December 2014

Healthy Banana and Peanut Butter Oat Cookies

It's pretty horrible out there at the moment, and when it is like this my instinct is always to reach straight for the biscuit barrel and comfort eat my way through the worst of the winter.  In many respects, I am like a human Yogi bear.
The problem with that is, come the January sales, I'm reluctant to buy anything as my waist line has expanded so much that nothing in my usual sizes fits me!  I need something that is a compromise between moderating the bad food intake and also satisfies the sweet tooth.  These little cookies are pretty good at that - they have no butter and no bags of granulated sugar in them, so as far as a feel good snack goes, they basically come with their own glowing halo's.
They are not only angelic, they are also remarkably useful for using up some of those pesky ingredients that I always seem to have lying around, like bananas and porridge oats, and as if that wasn't enough, they are ridiculously quick and easy to make.
I'm not sure of the exact calorie intake per cookie, but as the sweetening agents come from pretty natural ingredients (apple sauce, banana and peanut butter) they can't be that bad!  If you are already noticing that the Christmas season belt needs to be loosened a little, these should help. Take out the chocolate chips to make these positively saintly.
They are quite chewy and go down well as a mid-afternoon pick me up when you are sat at your computer in your office, staring at the wind and rain pounding down outside and knowing that you should probably be getting on with some work, but you just don't have the energy.  One or two of these, a cup of tea and you will soon be on track for that Employee of the Month badge that gets handed out every so often in a vain attempt to encourage productivity.  
So that's enough of singing their praises.  Let's get on with making them!  Go and find:

1 mashed up ripe banana
45 grams peanut butter
65 grams apple sauce
200g porridge oats
1/4 teaspoon salt
1 teaspoon cinnamon
1 teaspoon nutmeg
1/2 teaspoon ground cloves
1/2 teaspoon good vanilla extract
couple of handfuls of mixed chocolate chips - add more or less depending on how chocolatey you like your cookies!
These are ridiculously easy to make.

Preheat the oven to 180C and line a baking sheet with baking paper
Mix everything together in one hit until it comes together
Form into small patties and press down the top to get rid of any ridges that may catch in the oven
Bake for 15-20 minutes until golden brown, checking every so often.
Leave them to cool for a couple of minutes on the baking tray before transferring them to a cooling rack - they need to cool a bit before you handle them as this allows them to firm up, otherwise they just disintegrate in your hands!
Chow down, guilt free!
If you like (or hate!) what you have read, please do let me know in the comments below or slap me with a cheeky follow, or say Hi to me on my facebook group or twitter!